Water entering through a car door rarely announces itself. It may begin as a damp carpet edge, a cold draft, or a faint stain beneath the window. The sealing strip often looks intact, yet its rubber may have hardened, flattened, or pulled away at one corner. This is why understanding “How to prevent water leakage with automotive sealing strips” requires more than simply replacing old rubber.
Automotive sealing specialist Dr. Lena Hartmann explains, “A seal prevents leakage only when its material, pressure, and contact surface work together.” Her practical observation reflects workshop experience. A suitable strip must match the vehicle’s channel, temperature range, and compression level. Clean the mounting groove before installation. Remove dust, wax, and small stones. Press the strip evenly, especially around sharp bends and door corners. Do not stretch it during fitting. That common shortcut creates gaps later.
Check the door alignment as well. Uneven gaps can crush one section while leaving another barely touched. Inspect the seal after heavy rain, using a flashlight inside the cabin. Look for wet carpet, air movement, or water trails near the A-pillar. Drainage holes must remain open, too. A sealed door still needs controlled water escape.
Small details matter. Very much. Adhesive can help, but excessive adhesive may distort the strip and complicate future repairs. Even experienced installers miss this occasionally. Recheck the fit after several days, because rubber can settle. These five practical habits—choosing correctly, cleaning carefully, avoiding stretch, checking compression, and testing afterward—make water resistance more dependable, though never magically perfect.
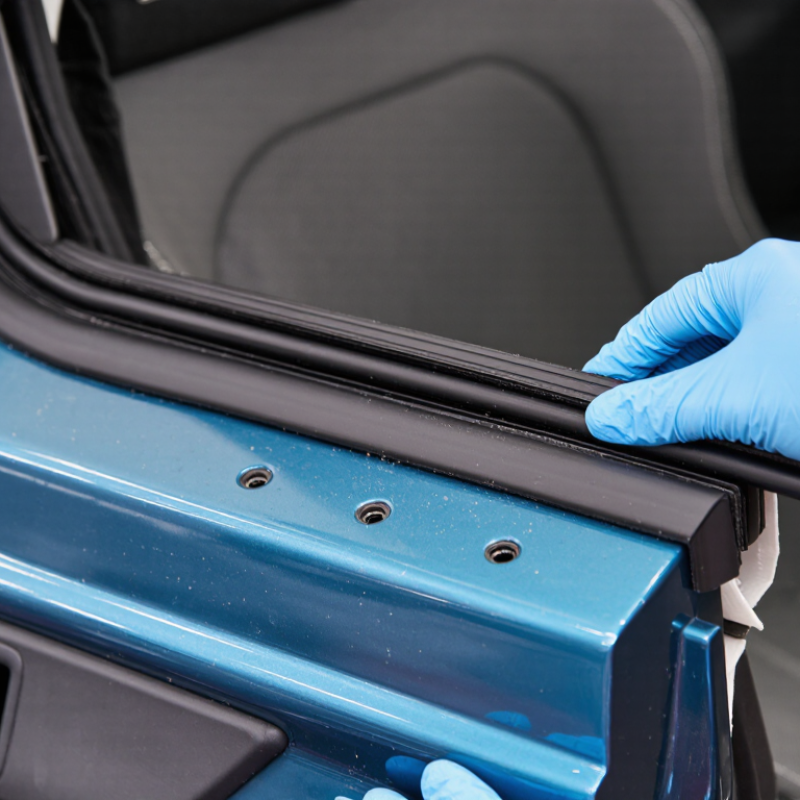
Understanding How Automotive Sealing Strips Prevent Water Leaks
Automotive sealing strips prevent water leaks by closing the narrow gaps around doors, windows, hoods, and trunks. They create a flexible barrier between the vehicle body and moving panels. When installed correctly, the strip compresses slightly and redirects rainwater toward drainage channels. The seal also reduces wind noise and limits dust entry.
A practical inspection starts with the corners. Look for flattened rubber, small tears, hardened sections, or loose adhesive. Press the strip gently with your fingers. It should feel resilient, not brittle. Clean the contact surface with a suitable mild cleaner before installation. Even a thin layer of dirt can create a leak path. I have seen water enter through a gap smaller than a pencil tip.
Correct alignment matters more than force. Do not stretch the strip while fitting it, because it may shrink later and expose the joint. Keep the ends tightly connected, especially near door hinges and lower corners. Check that the door closes evenly without excessive resistance. A seal that is too thick can distort the panel and cause another gap.
Temperature also affects performance. Cold rubber becomes less flexible, while intense heat can accelerate aging. Inspect the seals after heavy rain, then trace any moisture from the highest visible point. Water often travels along metal before appearing inside the cabin. One mistake is blaming the nearest seal immediately. Careful testing gives a more reliable answer.
Choosing the Correct Sealing Strip for Each Vehicle Location
5 Tips to Prevent Water Leaks with Automotive Sealing Strips
Choosing the Correct Sealing Strip for Each Vehicle Location
Water protection starts with location, not appearance. Tip 1: Use a flexible, weather-resistant strip around doors, where repeated compression occurs. The strip should close evenly without forcing the door. Tip 2: Choose a slimmer profile for side windows. A thick strip can create friction and affect window movement. Check the glass path before installation.
Tip 3: Select a soft, compressible seal for the trunk opening. It must follow corners without folding or leaving small gaps. Tip 4: For the hood, use a heat-resistant strip that tolerates vibration and engine warmth. Do not use the same profile everywhere. That shortcut often fails. I once found a leak caused by a strip that looked suitable but was too rigid for the hood edge.
Tip 5: Match the strip to the roof or sunroof channel carefully. Drainage paths must remain open. Clean dust, old adhesive, and moisture before fitting any seal. Press the strip gradually, especially around sharp curves. Avoid stretching it, because the material may shrink later. After installation, test with gentle water flow, not a high-pressure spray. Inspect the interior with a flashlight. Small damp marks can reveal poor alignment before serious damage develops. Rechecking the corners is worthwhile. My own fitting work is rarely perfect on the first attempt.
Installing Sealing Strips with Proper Cleaning and Alignment
Water leaks often begin with a small installation mistake. A sealing strip may look secure while dust blocks its contact surface. Before installation, inspect the door, trunk, or window frame for cracks and old adhesive. Remove loose material with a plastic scraper. Avoid sharp tools that can scratch painted metal. I once rushed this step and created a weak channel near the corner.
Clean the mounting area with mild soap and water. Dry it completely with a lint-free cloth. Moisture reduces adhesion. For greasy surfaces, use a suitable surface cleaner and follow its safety instructions. Test the cleaner on a hidden area first. Measure the full frame before cutting the strip. Leave no unnecessary gaps. A neat cut matters.
Begin at a straight section, not a corner. Align the strip with the original edge and press gradually. Keep steady pressure along each section. Do not stretch the material, because it may shrink later. At corners, guide it gently without folding or twisting. Press the joints firmly. Then close the door slowly and check the seal for uneven compression. A simple water test can reveal missed areas. Do not use high pressure. Recheck the alignment after one day, because the strip may settle slightly. My own installations improve when I inspect them twice, rather than trusting appearance alone.
5 Tips to Prevent Water Leaks with Automotive Sealing Strips: Installing Sealing Strips with Proper Cleaning and Alignment
| Tip |
Installation Focus |
Recommended Procedure |
Key Measurement or Limit |
Water-Leak Prevention Benefit |
| 1 |
Clean the bonding surface |
Remove dust, oil, wax, old adhesive, and loose particles. Wipe the surface with a clean, lint-free cloth and a vehicle-safe cleaner. Allow the surface to dry completely before installation. |
Surface must be visibly clean and dry |
Improves contact between the sealing strip and the vehicle surface, reducing channels where water can pass. |
| 2 |
Check the installation path |
Compare the strip with the door, trunk, hood, or window channel before removing any protective liner. Confirm that the profile follows the original sealing route without twisting. |
Continuous path with no gaps |
Prevents misplacement around corners and ensures the seal covers the complete opening. |
| 3 |
Align and press gradually |
Begin at a straight reference point, then install in short sections. Press the strip firmly along its length and avoid stretching it, especially around curves and corners. |
No visible twists, folds, or lifted edges |
Maintains uniform compression and reduces deformation that could create leak paths. |
| 4 |
Handle joints and corners carefully |
Use clean, square cuts where two ends meet. Position joints away from the lowest point of a channel when practical, and ensure both ends touch without overlapping or leaving an opening. |
Joint: flush, closed, and secure |
Minimizes weak points where standing water may collect and enter the vehicle interior. |
| 5 |
Allow the seal to settle and test it |
Close the panel gently to verify that it is not forced out of position. Let the strip settle according to the installation instructions, then spray water over the exterior and inspect the interior for moisture. |
Inspect after the first water test and again after 24 hours |
Confirms that the strip remains aligned under normal panel pressure and identifies leaks before they cause damage. |
Inspection checklist: Clean and dry surface, continuous coverage, correct alignment, firmly seated corners, closed joints, unobstructed drainage paths, and no moisture detected during the water test.
Maintaining Automotive Seals Through Regular Testing and Care
Water leaks rarely begin with a dramatic failure. They often start as a narrow gap along an aging automotive sealing strip. Regular testing can reveal this weakness before carpets become damp or metal surfaces begin to corrode. Inspect door, trunk, hood, and window seals every few months. Look for flattening, cracks, stiffness, or sections pulling away from the frame. Small changes matter.
Clean the sealing strip with mild soap and water, then dry it completely with a soft cloth. Dirt can create tiny channels for rainwater. During a hose test, use a gentle stream around one area at a time. Avoid high pressure, which may force water past a healthy seal. Sit inside with a flashlight and check for dark marks, dripping, or wet fabric. I once blamed a leaking door seal, but the real problem was poor alignment. That mistake reminded me to inspect the contact surface carefully.
Flexible seals should close evenly without excessive force. A damaged strip may need replacement rather than temporary adhesive. Use only a compatible rubber-care product, because oily chemicals can cause swelling or brittleness. Test again after maintenance, especially before a rainy season or long journey. Keep a simple inspection record with dates and locations. It may seem unnecessary. It helps identify repeated movement, installation errors, or gradual material fatigue.
Conclusion
How to prevent water leakage with automotive sealing strips begins with understanding how these flexible barriers block rain, moisture, dust, and outside noise from entering a vehicle. Regularly inspect the seals around doors, windows, and the trunk for cracks, flattening, looseness, or gaps. Damaged areas should be addressed promptly to prevent water from reaching the interior, electrical components, or storage spaces.
Choose a sealing strip that matches the vehicle’s specific location, shape, and sealing requirements. Before installation, clean and dry the contact surface thoroughly, remove old residue, and align the strip carefully without stretching it excessively. Press it firmly into place and check that doors, windows, and the trunk close evenly. Ongoing care is equally important: test seals after heavy rain, clean away dirt, and examine them periodically for wear. These simple inspection, installation, and maintenance habits can improve sealing performance and help extend the service life of automotive seals.
 Haala Parts
